My apologies for all the posts today, but I didn't want to include step-by-step tutorials in this blog post so I made three separate posts. This post is a continuation of my series: How To Format A Word Document For Uploading To Amazon.
Let's look at how we can use styles in MS Word to drastically cut down on the amount of time we spend formatting a document. Doing it this way has not only saved me time it has saved me much frustration. For instance, when I publish on Smashwords, I get through the notoriously ravenous Meatgrinder, unscathed, on the first try.
By the way, I'm using MS Word 2007 so all my instructions are for that version of Word.
MS Word Styles 101
All the styles I use build on the Normal style, so the first thing I do is make sure that the Normal style is exactly how I want it.
Modify The Normal Style: Default Settings
Keep in mind that this is just what I do. This isn't the only way of using Word to format a document, but it's what works for me. If something else is working for you, use that. (And please tell me what it is in the comments! I love learning new things.)
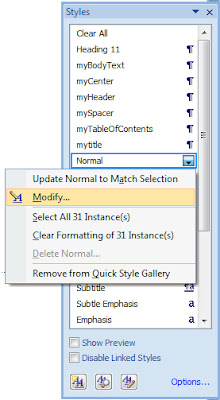
If you'd like to step through the following with me but you don't know how to modify a style in MS Word, I've created a step-by-step tutorial: How To Adjust The Paragraph Settings Of A Style In MS Word.
Okay, back? Everyone knows how to change the paragraph settings of a style? Great! Let's do it.
Changing the paragraph settings of the Normal style
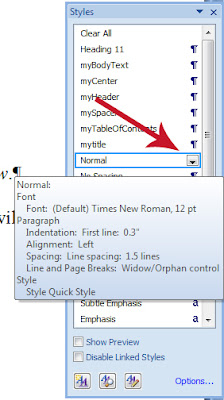
The first thing I do is make sure that my Normal style is set to what I call my Default settings. Here they are:
 |
| Figure 1: Click to enlarge |
In case the image isn't coming through I'll type them in here as well:
Paragraph settings:
Indentation: Left: 0"; Right: 0"All the other styles we're going to use are built up from the Normal style so it's important we have it just the way we want it.
Spacing: Before: 0pt; After: 0 pt
Special: None
Line Spacing: Single
Creating Our Own Styles
Now comes the fun part! We get to create our own styles based on the Normal style.
If you don't know how to create a style in MS Word that's fine. I've put together a step-by-step tutorial that walks you through this. It has oodles of pictures. You can get to it by clicking here: How To Create A Paragraph Style In MS Word.
myBodyText
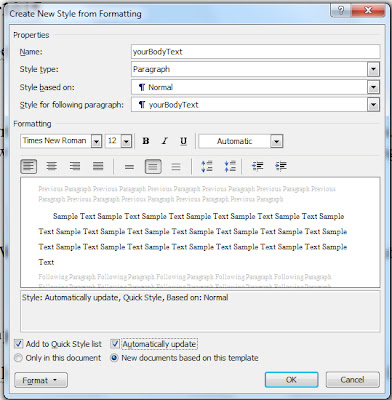
This is the style I use for all the text in my manuscript. I base it on the Normal style then adjust these settings (see Figure 2):
Special: First line: By 0.3"
Spacing: After: 6 pt
 |
| Figure 2: Click to enlarge |
Click OK and you're done!
mySpacer
I use "* * * *" to separate scenes and I like to leave one blank line above it and one blank line after it. But, rather than actually use a blank line I do this with styles. Here's how.
Just like we did for our myBodyText style, create a new style and call it "mySpacer" (or whatever you'll find memorable). For myBodyText we left no space above and only 6pt below each paragraph. Now, though, we want to leave 12pt before the paragraph and 12 pts after. Also, we center the style (see Figure 3).
 |
| Figure 3: Click to enlarge |
Click OK and you've created your second style.
I'm going to pick up the pace now since you're familiar with creating and modifying styles.
myTitle
Create another style, call it myTitle (or whatever you'd like). We're going to use this style to format the title of our book.
(Tip: Make sure you're basing these styles on your Normal style, the one we modified at the beginning of this tutorial.)
Here are the changes I make:
a. Increase the font size two points
I use Times New Roman 12 point for my Normal style so I'll increase the font size here to 14 pt. You may want your title to be even larger, and that's fine. Experiment. You might want to italicize your title, or make it bold. Play around, find out what looks good to you.
b. Center the style.
myCenter
You might wonder why you couldn't just center your text without using a style. I've found that when I do as much formatting as possible through my custom styles, things go more smoothly.
This one is easy, just create a new style, call it whatever you want--I use "myCenter"--and make sure that you center align the text.
myHeader
This is the last one! This will help your document headers come out the way you intend.
Creating this style is falling-off-a-log easy because you've just done it for myCenter. You might wonder why bother to create a new style for myHeader when it's exactly the same as myCenter. Here's why: You might want to do something unique to your header that you don't want communicated to everything you've centered.
For instance, let's say you want your header in bold or you want to decrease the font size. If you were using myCenter for this then those changes would be communicated to every paragraph you'd used that style for. And that probably wouldn't be something you'd want.
It may seem odd at first, but I try to create a new style for every function, ever kind of thing I want to do. You may end up with two or three more styles but, over the long run, I've found it sames me a lot of work.
How To Format A Header For Your Manuscript in MS Word
Oh, one more thing!
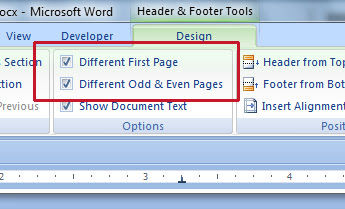
You all probably know how to do this already but, just in case you don't, I also want to talk about how to format your headers so that you have that nice name-on-one-side-of-the-page, title-on-the-other look (see Figure 4).
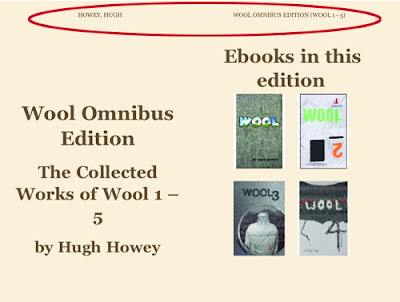 |
| Figure 4: Click to enlarge |
I hope you've gotten something out of this decidedly 'unwriterly' tutorial. Tomorrow when I continue this series on how to format an MS Word document and upload it to Amazon I'll pull everything together and show you my 'master template'.
Other articles you might like:
- How To Format A Word Document For Uploading To Amazon- The Starburst Method: Discovering Your Characters
- The Starburst Method: What It Is And What It Can Do
Photo credit: "Here comes the sun..." by chantrybee under Creative Commons Attribution 2.0.


